Getting Started
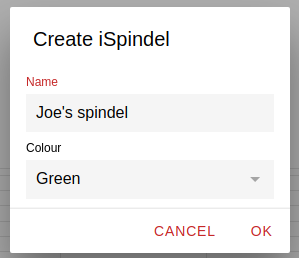
Tap on Add an Ispindel on the home screen or + Spindel from the side menu and give your spindel a name and an optional colour
Press the reset button on your spindel a couple of times so it goes into operation mode, this will start a wifi network named 'iSpindel'
Connect to the iSpindel wifi and open a browser, it should take you to the iSpindel configuration page
If it doesn't, you can go there manually by going to the following url: http://192.168.4.1
Click on 'Configuration' and enter the following:
SSID: The wifi network name that your spindel will connect to
Password: The password for the wifi network that your spindel will connect to
Update Interval: For normal operation 900 seconds is a good value (15 minutes), but while testing and calibrating you can set to to 30 seconds or lower. Remember to change it to a higher value as it will drain your battery (and spam the server)
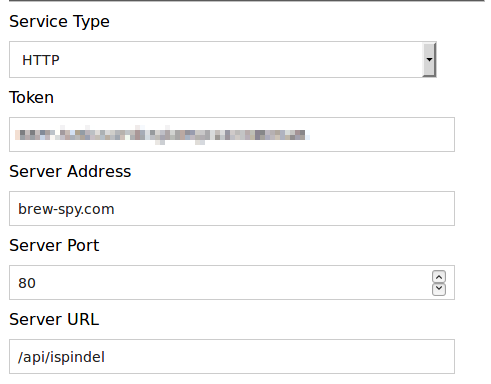
Service Type: HTTP
Token: Paste in the token as shown in the setup tab of your spindel in the app
Server Address: brew-spy.com
Server URL: /api/ispindel
Click on Save
For more info on setting up your iSpindel have a look here: https://github.com/universam1/iSpindel/blob/master/docs/README_en.md#configuration
The spindel should now start sending data to the BrewSpy server
Launch the app and see if you've received any data. Swipe down to refresh the screen.
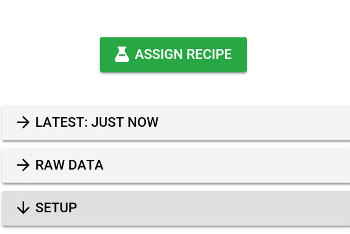
If the iSpindel has successfully sent data to the server you should see a Latest Data and Raw Data tab.
If you do not see any changes in Brewspy after some time - swipe down to refresh the data. If still no data, check that your configuration in step 2 is correct and that your iSpindel can connect to your wifi network.
You can now calibrate your iSpindel, if you haven't done so already
You can either calibrate manually using the instructions at: https://github.com/universam1/iSpindel/blob/master/docs/Calibration_en.md
or you can use the Caliration Wizard in the app, which guides you to calibrate your iSpindel using the easy method in the guide above
Once you have your calibration equation you can enter it in the app. This is optional, and if no calibration equation is entered the app will use the one entered in the iSpindel's configuration. However having it in the app is move convenient, as you don't have to launch the iSpindel in configuration mode if you ever need to change it.
To access the Calibration options in the app, expand the Calibration tab and click on the Calibration button
Brew a beer as you would normally would
Once you've pitched in the yeast and your iSpindel in your freshly brewed beer, you can start tracking the fermentation progress of your batch in BrewSpy
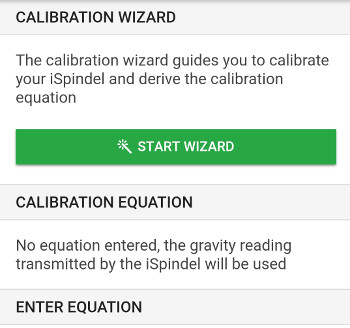
Simply tap on the big green Assign Recipe button and give your beer a name - or you can select a previously entered beer from the drop down list
BrewSpy will then start showing you a nice little graph, showing the fermentation progress, as well as some statistics regarding your latest brew
Once fermentation stops, tap on the big red Stop button to stop logging the iSpindel data on that recipe
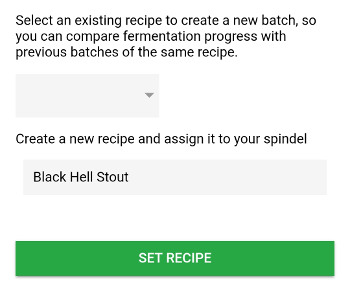
Click on Add a Tilt Hydrometer from the Home screen or + Titlt from the side menu and give your Tilt a name.
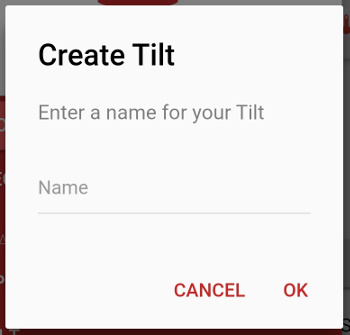
You now need to configure your Tilt Hydrometer to send its data to the BrewSpy server
To do so, enter the Cloud Url as shown in the app either in the Tilt app or Tilt Pi, depending on what you are using
If you have mulitple Tilts of different colors, you can reuse the same URL for all your Tilts and they will be automatically discovered by BrewSpy
The Tilt Hydrometer should now start sending data to the BrewSpy server
Launch the app and see if you've received any data. Swipe down to refresh the screen.
If the Tilt Hydrometer has successfully sent data to the server you should see a Latest Data and Raw Data tab.
If you do not see any changes in Brewspy after some time - swipe down to refresh the data. If still no data, check that the Cloud Url was saved correctly on the recipient device and that it has access to the internet.
Brew a batch as you would normally would
Once you've pitched in the yeast and your Tilt Hydrometer in your freshly brewed beer, you can start tracking the fermentation progress of your batch in BrewSpy
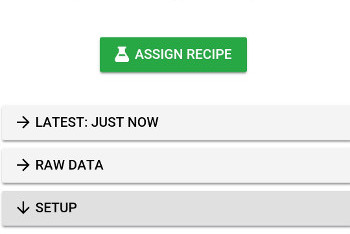
Simply tap on the big green Assign Recipe button and give your beer a name - or you can select a previously entered beer from the drop down list
BrewSpy will then start showing you a nice little graph, showing the fermentation progress, as well as some statistics regarding your latest brew
Once fermentation stops, tap on the big red Stop button to stop logging the Tilt Hydrometer data on that recipe
Device Setup
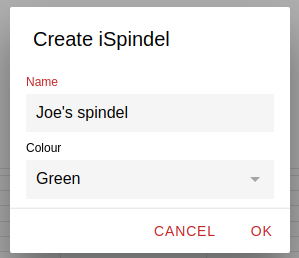
Tap on Add an Ispindel on the home screen or + Spindel from the side menu and give your spindel a name and an optional colour
Press the reset button on your spindel a couple of times so it goes into operation mode, this will start a wifi network named 'iSpindel'
Connect to the iSpindel wifi and open a browser, it should take you to the iSpindel configuration page
If it doesn't, you can go there manually by going to the following url: http://192.168.4.1
Click on 'Configuration' and enter the following:
SSID: The wifi network name that your spindel will connect to
Password: The password for the wifi network that your spindel will connect to
Update Interval: For normal operation 900 seconds is a good value (15 minutes), but while testing and calibrating you can set to to 30 seconds or lower. Remember to change it to a higher value as it will drain your battery (and spam the server)
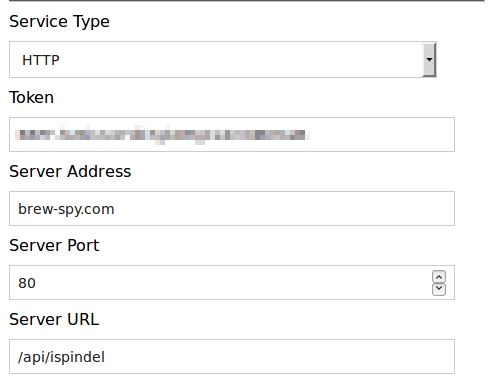
Service Type: HTTP
Token: Paste in the token as shown in the setup tab of your spindel in the app
Server Address: brew-spy.com
Server URL: /api/ispindel
Click on Save
For more info on setting up your iSpindel have a look here: https://github.com/universam1/iSpindel/blob/master/docs/README_en.md#configuration
The spindel should now start sending data to the BrewSpy server
Launch the app and see if you've received any data. Swipe down to refresh the screen.
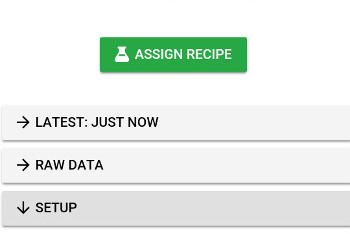
If the iSpindel has successfully sent data to the server you should see a Latest Data and Raw Data tab.
If you do not see any changes in Brewspy after some time - swipe down to refresh the data. If still no data, check that your configuration in step 2 is correct and that your iSpindel can connect to your wifi network.
You can now calibrate your iSpindel, if you haven't done so already
You can either calibrate manually using the instructions at: https://github.com/universam1/iSpindel/blob/master/docs/Calibration_en.md
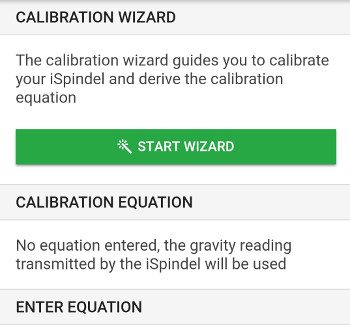
or you can use the Caliration Wizard in the app, which guides you to calibrate your iSpindel using the easy method in the guide above
Once you have your calibration equation you can enter it in the app. This is optional, and if no calibration equation is entered the app will use the one entered in the iSpindel's configuration. However having it in the app is move convenient, as you don't have to launch the iSpindel in configuration mode if you ever need to change it.
To access the Calibration options in the app, expand the Calibration tab and click on the Calibration button
Click on Add a Tilt Hydrometer from the Home screen or + Titlt from the side menu and give your Tilt a name.
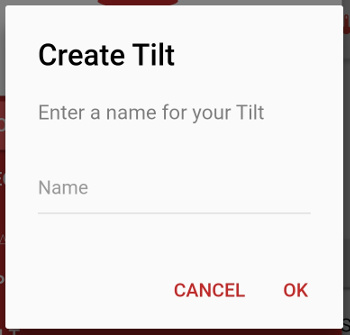
You now need to configure your Tilt Hydrometer to send its data to the BrewSpy server
To do so, enter the Cloud Url as shown in the app either in the Tilt app or Tilt Pi, depending on what you are using
If you have mulitple Tilts of different colors, you can reuse the same URL for all your Tilts and they will be automatically discovered by BrewSpy
The Tilt Hydrometer should now start sending data to the BrewSpy server
Launch the app and see if you've received any data. Swipe down to refresh the screen.
If the Tilt Hydrometer has successfully sent data to the server you should see a Latest Data and Raw Data tab.
If you do not see any changes in Brewspy after some time - swipe down to refresh the data. If still no data, check that the Cloud Url was saved correctly on the recipient device and that it has access to the internet.
From the side menu in BrewSpy, tap on 'Add Device' and select 'RAPT PILL'. Give your RAPT Pill a name and an optional colour
Log in to your RAPT Cloud account
Click on your name at the top right and select "Webhooks"
Click on "Create new Web Hook" in the menu bar and then "Custom Webhook"
In the details tab, enter a name for your webook.
For URL, enter https://brew-spy.com/api/rapt
For Method, select Post
Go back to BrewSpy and select the text under where it says "In Payload, paste in the following:"
Paste that in the "Payload" tab
Finally in the "Devices" tab, select your device and click "Save"
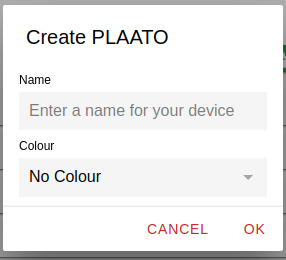
Tap on Add a PLAATO Airlock on the home screen or + PLAATO from the side menu and give your airlock a name and an optional colour
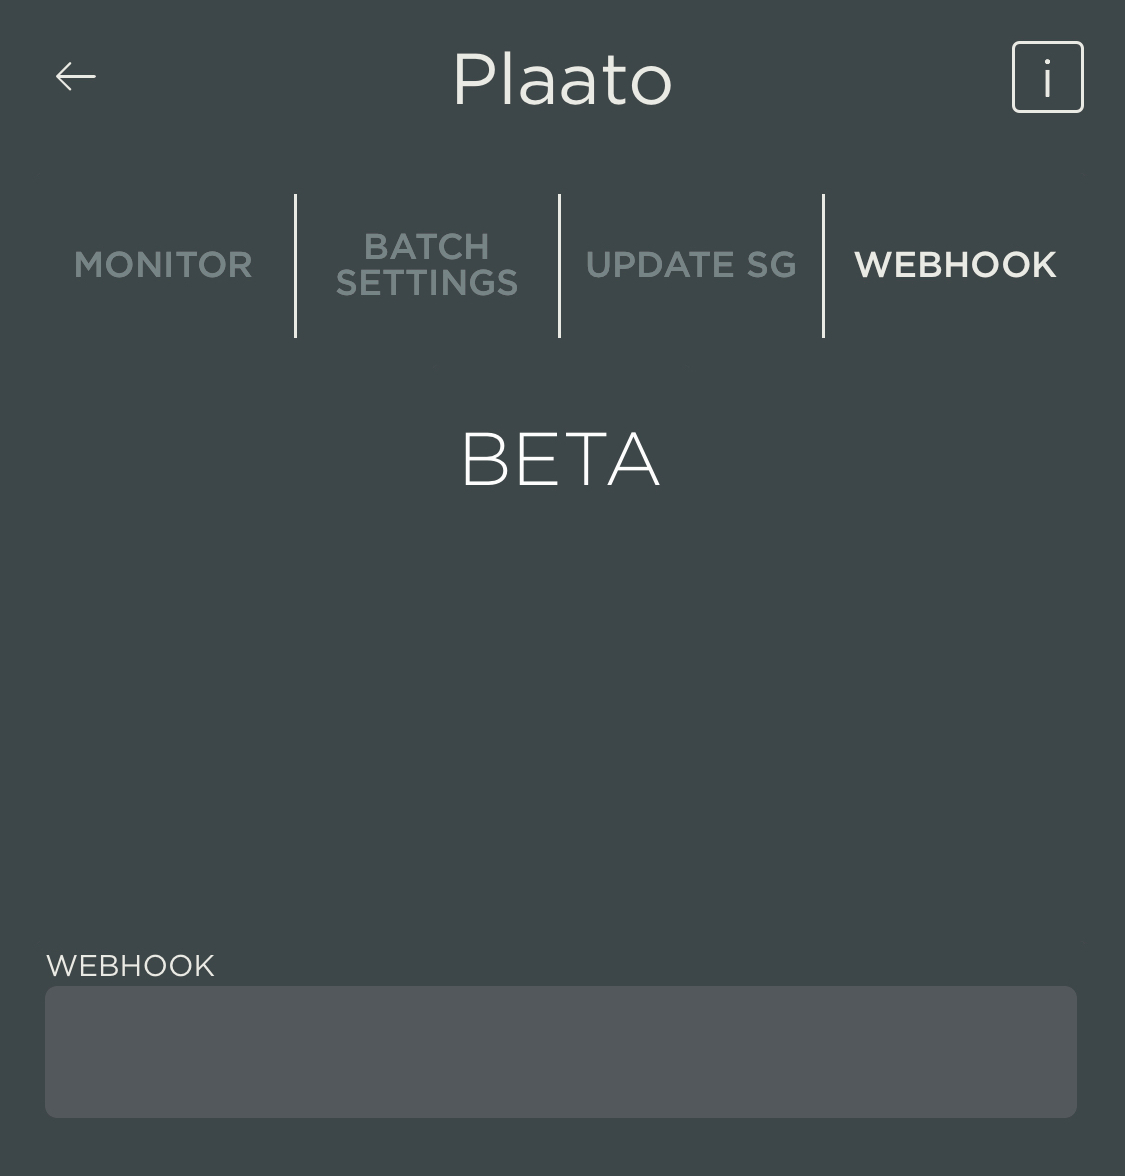
Launch the PLAATO app and go to the WEBHOOK tab. There enter the Webhook URL as it is displayed in the BrewSpy app under the Setup tab for your PLAATO Airlock.
If you have more PLAATO Airlocks you don't need to go through this step again, they will be picked up by BrewSpy and added in the app automatically
The PLAATO airlock should now start sending data in 5 minute intervals to BrewSpy.
Launch the app and see if you've received any data. Swipe down to refresh the screen.
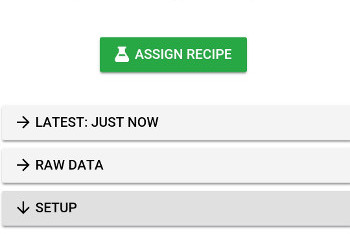
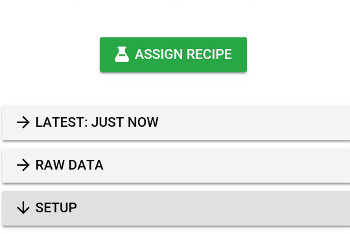
If the PLAATO airlock has successfully sent data to BrewSpy you should see a Latest Data and Raw Data tab as the screenshot below.
If you do not see any changes in Brewspy after some time - swipe down to refresh the data. If still no data, check that the Webhook Url was saved correctly on the recipient device and that it has access to the internet.
Contact the PLAATO team and request an Auth Token for your PLAATO Keg.
Specifically their instructions state:
To get the auth_tokens contact the Plaato team by sending an email to support@plaato.io with the subject "Auth token" and provide your username. We will send you your token(s) as soon as possible.
They should reply within a couple of days
Go to the Taplist screen (using the side menu) and tap the green plus button to create a new tap (if you haven't done so already)
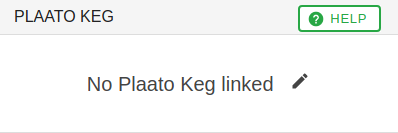
Tap on the newly created tap to bring up the tap settings and then tap on where it says 'No Plaato Keg linked'. Enter your AuthToken in the window that pops up
Create a new device in BrewSpy of type 'Custom'. Make a note of the Token value displayed in the app
In BrewPiLess, add Generic HTTP Logging with the following options:
Log time period 600 seconds (10 mins) is fine
Service Type: HTTP
Method: POST
URL: http://brew-spy.com/api/custom
Data Type: application/json
Format: { angle: %t, temperature: %b, gravity: %g, battery: %v, token: 'XXX' }
Replace XXX with the Token from BrewSpy, make sure the token is in quotes ( ' )
If you prefer Plato instead of SG, replace %g with %p "
General
Subscription
Yes, BrewSpy is free to use.
However the following limitations exist to users without a subscription (Premium users):
- Ads are displayed at the bottom of the app
- You can add only one device
- Push notifications are disabled
- Share links expire after 6 hours
You can upgrade to premium at any time to remove these limitations
Recipes & Data
BrewSpy tags your fermentation data with the current batch you are brewing. That way it can create a fermentation graph and generate other statistics regarding your fermentation.
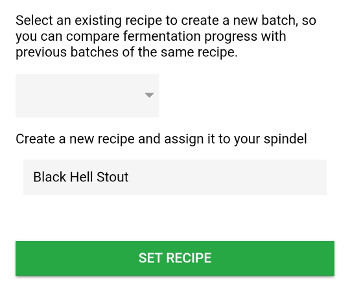
When you start a new fermentation, you need to tap the green 'Assign Recipe' button in order to tell BrewSpy that you are starting a new fermentation, otherwise no graph will be displayed. It then lets you enter a new recipe or choose one that you have created in the past. If you choose an existing one, a new 'batch' will be created for that recipe. This lets you compare fermentation progress between different batches of the same recipe.
Once a fermantation is done, tap on the red 'Stop' button to tell BrewSpy to stop logging data against that recipe
You can set up push notifications to receive alerts when certain events occur. This feature is only available to premium users.
Push Notifications are defined per recipe, so your device has to be assigned to a recipe for these to work. When you start a new batch of a recipe that had notifications set up, BrewSpy will use the same notification settings for the previous batch. However if you start a new recipe, it will not use the previous settings and you would have to set up notifications for the new recipe.
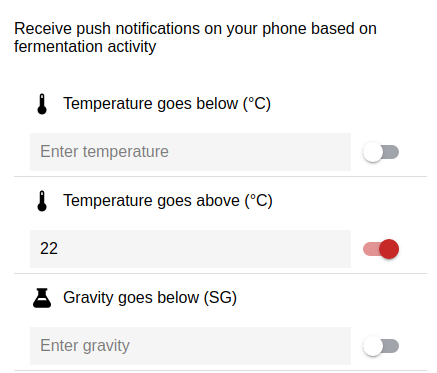
To set up notifications, after starting a new batch, scroll down to the Notifications tab and tap on Setup Notifications. This will bring up the notifications window which allows you to choose what type of notifications you wish to receive, such us temperature ranges, attenuation, stopped fermentation.


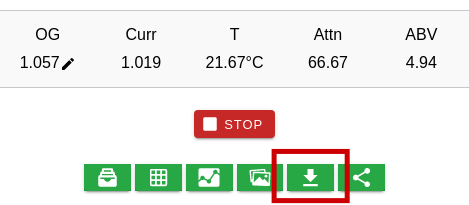
Use the green download button to download all data related to a batch as an excel or csv file
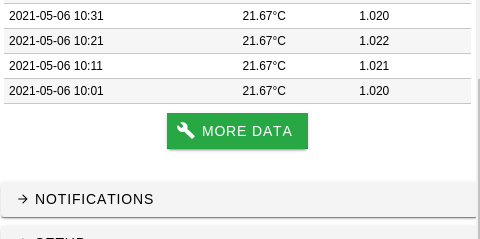
You can also download your data from the data screen. This can be accessed by expanding the Raw Data tab and tapping on More Data. The download button (top right) on this screen will include all data that has been loaded on the screen. Scroll down to load more data.
Access the data screen by expanding the Raw Data tab and tapping on More Data
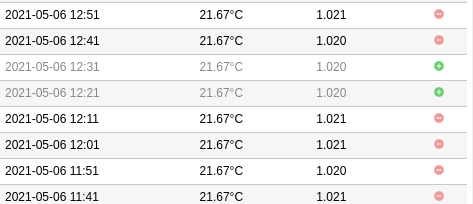
Locate the data you wish to delete and tap on the red minus button to delete it. Should you change your mind later you can always undelete it by tapping on the green plus button.
Tap on Save Changes at the bottom to save your changes
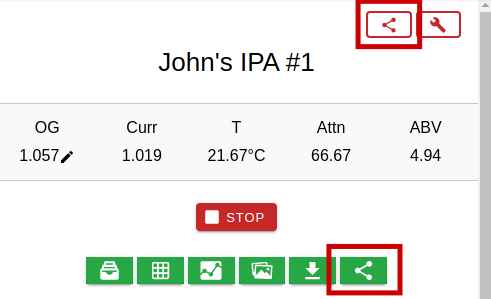
You can use any of the 2 share buttons that are available on the home page during an active fermentation. Both will generate a link that you can use to share your fermentation progress with other people.
The red share button at the top will always show the latest data/graph from your device even if the current fermentation finishes and there's no active fermentation or you start a new fermentation.
The green share button under the recipe name will only show the data/graph that belongs to its related batch. Once fermentation finishes it will stop updating and will just show the final graph of that batch
Should you change your mind after sharing with other people, simply tap on the share icon and select Delete. This will delete the link and it will no longer work
Taplist
The Taplist feature can be accessed using the side menu.
To create a tap, simply tap on the green + button at the bottom right of the Taplist screen
To add a beer on tap, tap on it to bring up its settings. Then tap below Currently on Tap. It will allow you to enter a beer manually or choose one of your previous batches. It will also offer to put a beer on tap once fermentation finishes.
You can also connect a PLAATO Keg to a tap. Simply ask the PLAATO team for an AuthToken and enter it under the PLAATO Keg section.
You can share your taplist using the share button and add it as a widget in your home screen.
Widget
API
URL: https://brewspy.app/api/export
Method: Either a POST request with the parameters as a JSON in the request body, or a GET with all the parameters appended to the url, prefer POST so you don't expose your token
Parameters:
token: (required) Your device API token - can be found in the configuration window of the device
start: Start time/date.
- This can either be an absolute day (format: yyyyMMdd, eg 20230105) month (format: yyyyMM, eg 202301) or year (eg 2022)
- Or a time period the current time, format -Nx
where N is a number and x is one of (m, h, d, M, y) which correspond to (minutes, hours, day, months, years)
so: last 15 minutes would be: -15m
end: End time, defaults to now. Same format as start
sort: asc or desc, default desc
format: csv, json or xml, default csv
limit:Number of results, maximum value is 1000, default is 1000
page:The page of results to return
For example to retrieve the latest reading in json format:
https://brewspy.app/api/export?token=
All readings from last day:
https://brewspy.app/api/export?token=
Troubleshooting
First try refreshing the data on the home screen (touch hold and drag down).
If an error is displayed after the refresh then there is a problem with the server. The hosting may be down, there might be a bug causing the issue or the server is being updated. Try again 30 minutes later and if the issue still exists, report it by through the Leave a comment feature in the Settings screen or by sending an email to info@brew-spy-com
If the data refreshes successfully and no error is displayed the the server is running correctly and the issue is most likely with your device. Here are some things to check:
If your fermentation vessel is inside a fridge the wifi signal in the fermentor will be weak, especially if its a stainless steel fermentor. Try having your wifi router or a wifi repeater as close as you can to the fermentor and see if that helps. Sometimes the issue occurs during very.
Sometimes during active fermentation the device is unable to connect to wifi for some reason and no data is sent for a few hours (or even days). I have experienced this issue many times with both iSpindel and Tilt Hydrometer, as well as other users have reported this issue. It will eventually resolve itself usually after a few hours.
For iSpindel: try recharging the battery fully even if it is not empty - this has solved similar issues for me and other users as well.
If all else fails, try searching the internet to see how other people resolved issues similar to yours.
In order to show a graph, your device needs to be assigned to a recipe. So if it is not assigned to a recipe, tap on the green Assign Recipe button and a graph will be shown once new data comes in.
If the device is assigned to a recipe, the graph will be blank for the first couple of hours. This is because BrewSpy averages the data it receives in 1 hour intervals. You can disable this feature by going to Settings and unchecking the Smooth Graph option. Then the graph will show all data as it is received
Should you ever need additional support, or have an idea for a new feature, you can use the Leave a comment feature in the Settings screen, or send an email to info@brew-spy.com